Docker Project for DevOps Engineers
Day 17 : #90DaysOfDevOps Challenge
What is Dockerfile
A Dockerfile is a text file that contains a set of instructions for building a Docker image. The Dockerfile describes how to create a custom Docker image that includes all the necessary dependencies and configurations for running an application. The Dockerfile contains commands that are executed in sequence to build the image. Each command in the Dockerfile creates a new layer in the image.
Dockerfile is used as the source code to build Docker images, and it is highly configurable, allowing developers to customize the environment for their application. Dockerfile is typically used with the docker build command, which takes the Dockerfile as input and produces a Docker image as output. Once the image is built, it can be used to start containers that run the application.
Dockerfiles are commonly used to define and automate the build process for complex applications that require specific dependencies, configuration, and environment variables. They are a powerful tool for building consistent and reproducible Docker images that can be easily shared and deployed across different environments.
Let's talk about what we insert in Dockerfile
FROM: Specifies the base image that the new image will be built on top of. For example, you might use an official Node.js image as the base for an application that runs on Node.js.RUN: Executes a command in the image. This command is run during the image build process. For example, you might use theRUNcommand to install necessary packages or dependencies for your application.COPY: Copies files from the host machine to the image. For example, you might use theCOPYcommand to copy the files for your application into the image.ENV: Sets an environment variable in the image. For example, you might use theENVcommand to set a variable that holds the version of your application.EXPOSE: Specifies the ports that should be exposed on the container. For example, you might use theEXPOSEcommand to specify that port 8000 should be exposed on the container.CMD: Specifies the command that should be run when a container is created from the image. For example, you might use theCMDcommand to specify that your application should be started when the container is created.
Here’s an example of a simple Dockerfile that sets up a Node.js environment:
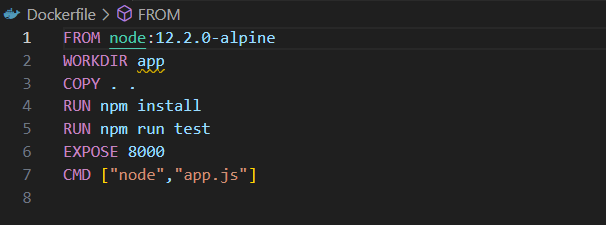
FROMcreates a layer from thenode:12.2.0-alpineDocker imageWORKDIRdefines the working directory of a Docker containerCOPYadds files from the host machine to the imageRUNinstalls necessary packages or dependencies likenpmfor the applicationEXPOSEspecifies the port 8000 that should be exposed on the containerCMDspecifies what command to run within the containerProject:- Node Todo App
Task: Create a Dockerfile for a simple web application (e.g. a Node.js or Python app)
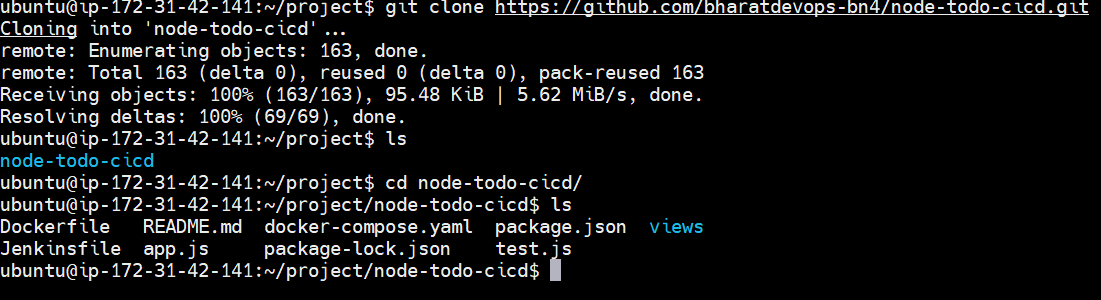
Clone the repository in your system using the git clone command, view the content of the repository & create a Dockerfile if not present or modify the present Dockerfile.
Step 1:- We can find the source code from the below GitHub location
https://github.com/bharatdevops-bn4/node-todo-cicd.git
Step 2:- Firstly need to create a separate directory to create a project so it will very easy to track all the changes we need to clone the repo by using the below command
git clone <Repo name>
Step 3:- Now we need to create Dockerfile to write the set of instructions to run the code
NOTE:- Here we have already a docker file that case no need to create a again
FROM node:12.2.0-alpine
WORKDIR app
COPY . .
RUN npm install
RUN npm run test
EXPOSE 8000
CMD ["node","app.js"]
Step 4:- Now using the Docker file we can create an Docker image
docker build . -t <image_name>
# Ex:- sudo docker build . -t node_todo_app

Step 5:- Now using the above docker image we can create a n number of docker containers
docker run -itd -p 8000:8000 node_todo_app

Step 6:- Now we need to search in the web browser along with the ipv4 address and port number
Note: Go to your ec2 instance security group and check whether the port 8000 is opened or not. If not, then add it to the inbound rules of the security group.

Step 7:- Now we need to push that image to the Docker Hub repo so everyone can use that same image. using the below url we can log in to Docker Hub
Step 8:- Now we need to log in to the docker hub from the Linux machine using docker hub conditionals
docker login
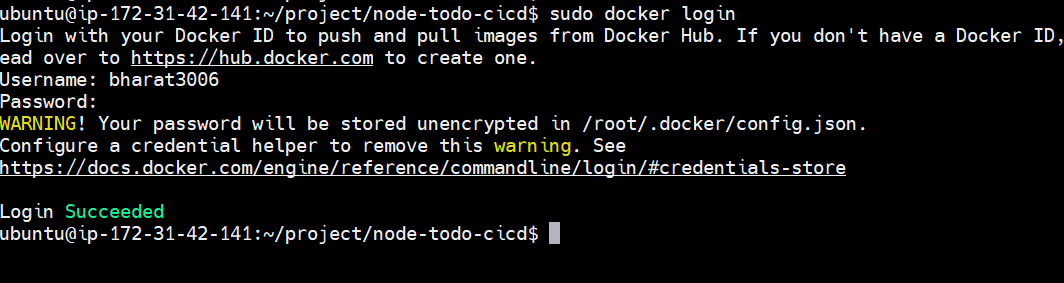
Step 9:- Now we need to tag that image before pushing it to the docker hub
docker tag node_todo_app bharat3006/node_todo_app

Step 10:- Now we can push that image to the docker hub
docker push bharat3006/node_todo_app
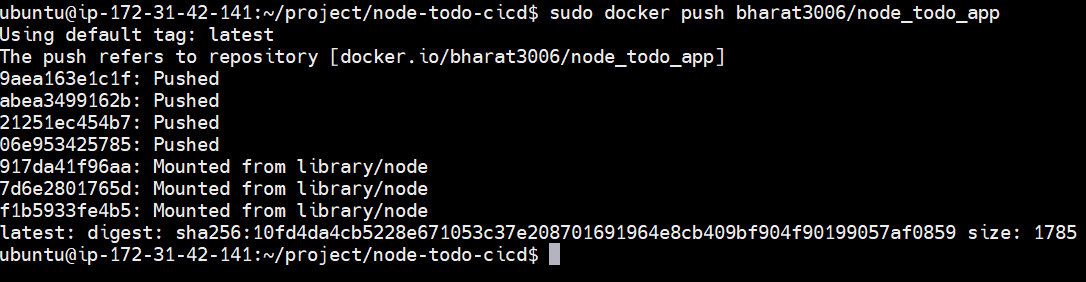
Step 11:- Now we can see the docker image in the docker hub
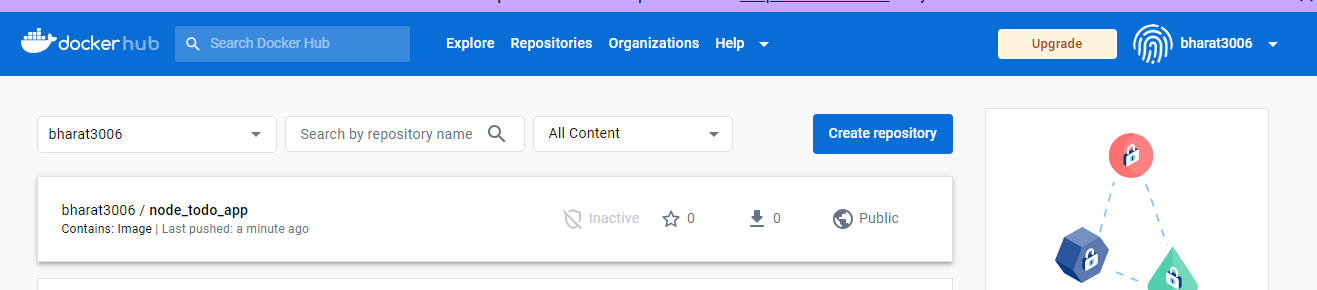
Congratulations! ✨🎉🎉🎉🎉🎉🎉🎉🎉🎉🎉🎉🎉🎉🎉🎉🎉🎉🎉🎉🎉🎉You have successfully installed Docker on your Ubuntu instance, added the current user to the Docker group, created a Docker container for the provided Node-Js demo application. Exposed port 8000 for everyone using IPv4 in the inbound rule of your instance's security group. Also pushed the Docker images to DockerHub.
Thank you for reading!!!
~Bhaarat


